
This time around Brian Long looks at how units and forms work in Kylix projects.
This article first appeared in Linux Format Issue 23, January 2002.
Click here to download the files associated with this article.
If you find this article useful then please consider making a donation. It will be appreciated however big or small it might be and will encourage Brian to continue researching and writing about interesting subjects in the future.
Apart from the odd simple message box here and there, the applications built during this series have only had one form in them. This month we will build an application that has more than one form and look at how we can display additional forms, and how we control and access what is displayed on those forms. But first, we need to take a good look at units and their structure.
Every form you design in Kylix has two associated files. The information about the form itself (its properties, the components on it and their properties) is stored in a form file, which by default is a text file with a .xfm extension. The source code that defines the behaviour of the form and its components is stored in a form unit, also a text file, which has a .pas extension.
A form unit is a special case of the more general unit, which contains any amount of (hopefully) reusable code, data types, constants and variables. It is common to modularise an application into a (potentially large) number of units, some of which will be form units and others will not.
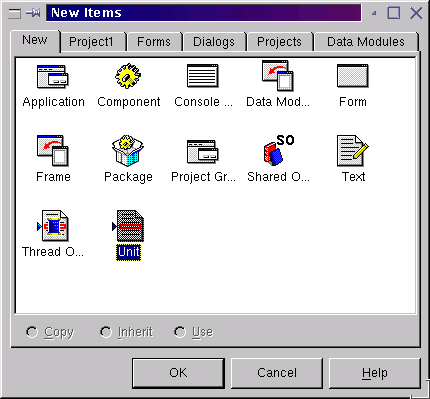
The structure of a unit is designed to enforce implementation hiding. Other than a header line (called the unit heading), each unit contains two mandatory sections, the interface section and the implementation section. This is what a fresh unit looks like, after choosing File | New... and selecting Unit from the list of offerings (as shown in Figure 1):
unit Unit2;

interface

implementation

end.
Figure 1: Making a new unit in Kylix
Both the interface and implementation sections of the unit are empty by default, but we can add as many items as we need to each section.
The interface section can contain declarations of any variables, constants, types or routines that need to be accessible outside the unit (essentially publicly available). Note that a declaration of a routine defines its name, parameters and whether it returns a value, but contains none of the implementation of that routine.
The implementation section contains declarations of any variables, constants and data types that are needed by the implementation of any routines, which also reside in the (appropriately named) implementation section. Nothing outside the unit has access to the implementation section (which is private), just the items declared in the interface section.
If you are familiar with C or C++, the interface section is like a header file, containing declarations of publicly available items, while the implementation section is like the C source file containing all the subroutine implementations.
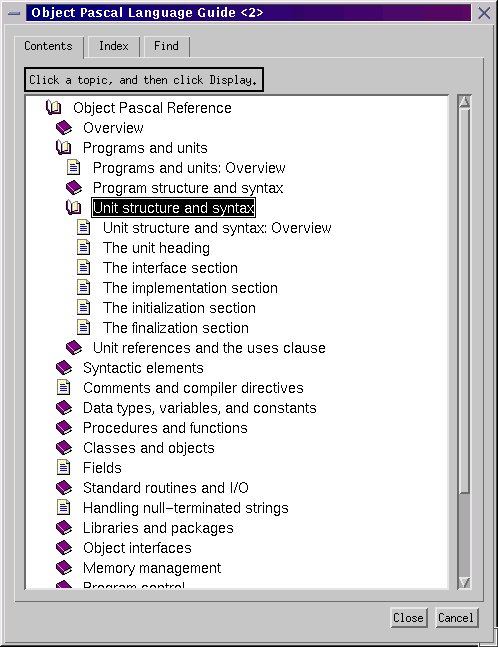
You can find more formal information about unit structure in the online help. Choose Help | Object Pascal Reference Guide to get the appropriate help file loaded into the help system. Now press the Help Topics button to show the hierarchical Contents page (see Figure 2) and navigate as follows:
Object Pascal Reference
  Programs and units
    Unit structure and syntax
Figure 2: The capacious online help system has much information about Object Pascal
Here you will see a number of help topics that give an overview and describe the specifics of the sections that make up a unit (including descriptions of the optional initialisation and finalisation sections).
When you save a unit (with File | Save As...) the IDE ensures that the unit heading is updated to reflect the new file name. It is because the file names are turned into program identifiers that you must choose file names that follow Pascal identifier syntax (must start with an alphabetic character, followed by any number of alphanumeric characters or underscores).
The following is an example of a slightly less trivial unit, stored as CardLib.pas:
unit CardLib;

interface

type
  TCardSuit = (csClubs, csDiamonds, csHearts, csSpades);
  TCardValue = 1..13;
  TCard = record
    Value: TCardValue;
    Suit: TCardSuit;
  end;

function CardToStr(const Card: TCard): String;

implementation

const
  CardValues: array[TCardValue] of String =
    ('Ace', '2', '3', '4', '5', '6', '7',
     '8', '9', '10', 'Jack', 'Queen', 'King');
  CardSuits: array[TCardSuit] of String =
    ('Clubs', 'Diamonds', 'Hearts', 'Spades');

function CardToStr(const Card: TCard): String;
begin
  Result := CardValues[Card.Value] + ' of ' + CardSuits[Card.Suit]
end;

end.
There are several things to look at in this more realistic unit, but let's take it one element at a time.
The first thing you see in the interface section is a type section containing three user-defined types intended for use by other code in an application.
The first is an enumerated type. It specifies that any variable defined as TCardSuit can only have one of the four listed values at any given time. The values do not have any particular meaning, but they are clearly named to be descriptive (certainly more descriptive than the numbers 1 to 4 anyway) and program code will (hopefully) make them understandable as card suits.
The second type is a subrange type and specifies that a variable of type TCardValue can hold any value between 1 and 13. During compilation of a program, the compiler will reject an attempt to assign a constant value of, say, 14 to such a variable. However assignments that use expressions rather than literal values pose more of a problem and require run-time range-checking to fully uphold the subrange intent (see project options appendix).
You can see the general idea is to try and ensure variables used to represent certain aspects of a playing card have little scope for erroneous values. Object Pascal was originally designed as a teaching language and has many features that are designed to lower the risk of error. Type strictness and a wide variety of type categories are good for representing program information in precise ways, leaving less scope for error.
The third type is a record type (you might know these types as structures in other languages). Unlike an array that contains homogenous elements (called array elements) a record contains heterogeneous elements (called fields). Each time you declare a TCard variable you get a TCardValue field called Value and a TCardSuit field called Suit. The TCard record is a data structure that contains all the data attributes that define a playing card (its suit and value).
After the type declarations is a function declaration. A function is a subroutine that is designed to return a value of a specified type, and a call to a function can be used wherever a value of that type is required. In the last instalment we saw a call to the Random function that takes a value and returns a pseudo-random value between 0 and one less than the passed value. The call to Random appeared on the right-hand side of an assignment, with the returned integer being assigned to whatever was on the left side.
The other type of available routine in Pascal is a procedure. This is like a function that does not resolve down to a returned value. Last time we called the procedure Randomize to initialise the seed value used by Random.
The function is designed to take a TCard record that represents a card and produce a readable string that tells you its identity. Note that the const parameter modifier tells us that any card record passed in will not be modified, and also ensures it gets passed in as efficiently as possible (it is actually passed by reference, but cannot be altered).
Notice that only the function header is present in the interface section. This makes it callable from other code. Its implementation can be found in the implementation section along with a couple of private constants, which are solely used by the CardToStr code and are not intended for external consumption.
You can see that defining functions (or procedures) is very much like defining methods (we did that a couple of months back). However methods belong to a class and so are shared by all objects of that class type. Functions and procedures are not related to any classes; they are simply independent reusable subroutines.
The constants are a little different from normal constants such as those below.
const
  Pi = 3.14159265358979323846;
  DaysPerWeek = 7;
Usually, a constant is a symbol that represents a simple value and the definition is made with an equality symbol (=). Sometimes you need a constant value of a more complex type, such as an array or record, and this requires you to define a typed constant.
Typed constants include type information and an appropriate list of values. A simple (and fairly pointless) example would be:
const
  Factor: Integer = 10;
This is pointless because a normal constant can represent a simple integer value. Perhaps a better example would be:
const
  Values: array[1..4] = (10, 20, 30, 40);
This is a four element array whose values are specified in the constant definition. This represents the common appearance of an array definition, where the element count is defined by a subrange (1..4 in this case).
The constants in the unit above look a little different, so you should understand that an array type defined like this:
var
  AnArray: array[TCardSuit];
is exactly the same as the following definition, only a little more concise.
var
  AnArray: array[csClubs..csSpades];
They both say that the array contains one element for each value in the TCardSuit type, but does away with the subrange and substitutes the type itself. Note that arrays can be indexed with any ordinal type.
The CardToStr function takes the two fields of the card record, indexes into the appropriate constant array to get the textual representation of the suit and value and then concatenates them together with the word of inbetween. The function specifies its return value by assigning it to the special identifier Result. When the function exits the value of Result is returned to the calling code.
One important thing regarding units remains, which is how you tell the compiler which units to find things in. For example, if you are writing code in a form unit and wish to call CardToStr, you must tell the compiler to look in the CardLib unit.
This is done with uses clauses. If you look at a form unit, you will see a uses clause as the first entry in the interface section. This lists all the units that contain things we need to access and perhaps some others as well, just in case we need to access their contents.
A unit can have two uses clauses: one as the first thing in the interface section and one as the first thing in the implementation section. As you build up a form, many component declarations can be added to the form class in the unit interface section. These may refer to a variety of component types that are defined in various CLX units, so it makes sense for these units to be added to the interface section uses clause.
However, as you write code in event handlers and other methods and routines in the implementation section, you will need to use more units. It is common practice to add these units to the implementation section uses clause. The key point to understand is that when you add the name of unit (which is case-sensitive) to a uses clause, any code from that point down can access the items exposed in the interface section of the used unit.
So once you add CardLib to the uses clause, you could write something like this (see Figure 3):
Figure 3: The custom card routine at work

procedure TfrmMain.Button1Click(Sender: TObject);
var
  Card: TCard;
begin
  Card.Value := 1;
  Card.Suit := csSpades;
  ShowMessage(CardToStr(Card));
end;
Now that we have an understanding about unit structure, you should be able to navigate a form unit and understand what's what. The interface part has a uses clause, followed by the actual form class and a global variable that provides access to the default instance of this class elsewhere in the application. The implementation section is where event handlers and other methods are implemented, but starts life with nothing in it other than what looks like a comment:
{$R *.xfm}
Comments that have a $ as their very first character are actually compiler directives; this directive instructs the linker to link in the associated form file to the resultant executable (after transforming it from a text file into a smaller, binary representation) so the form will work at runtime. Do not remove this directive or the form will fail to show up at runtime and you will see an undesirable error.
To access another form, you must use its form unit and then you access it using the global form variable.
To see the idea make a new project, change the form's name to frmMain and save it as MainFormU.pas and FormsApp.dpr. Make a new form (File | New Form), name it frmDialog and save that as ModalFormU.pas (this will be used like a dialog, sometimes called a modal form). Now make another form called frmWindow and saved as ModelessFormU.pas (this will be used like a normal window, sometimes called a modeless form).
Resize the forms as you like and add a memo component to frmWindow, with its Align property set to alClient so it occupies the whole form. Add three buttons to frmDialog with captions of &OK, &Canceland &Help.
A dialog is modal, which means once it is invoked you cannot switch to other windows in the application without closing it first. Usually they are used to collect information, such as program options or user preferences and so they have various controls like edit boxes and checkboxes on them. The dialog is normally closed with an OK and Cancel button to indicate whether the user is happy with their choices or wishes not to make any.
Every form has a ModalResult property which is only useful when it's displayed as a dialog (modal). Any code can set ModalResult to any integer value and if the value is non-zero the dialog closes and returns the value. The code that showed the dialog can then decide how to proceed based on the dialog's modal result.
To make the job of a button on a dialog more straightforward, all buttons also have a ModalResult property. Whenever the button is clicked, its ModalResult is assigned to the form's ModalResult, meaning if the button is pressed on a dialog and ModalResult is non-zero the dialog will close automatically.
Set the OK button's ModalResult to mrOk (a constant for 1) and its Default property to True (to make it respond to the Enter key). On the Cancel button, set ModalResult to mrCancel (2) and Cancel to True (to make it respond to the Escape key).
Now drop a checkbox on the form and set the Caption to Show the window. We will use this checkbox as another way of hiding/showing the window.
Double-click the Help button and have it produce a simple help instruction:
procedure TfrmDialog.Button3Click(Sender: TObject);
begin
  ShowMessage('The checkbox lets you control the window''s visibility')
end;
Normal windows are often sizeable because of the kinds of components placed on them. Dialogs however are more like data entry or option choosing screens, which don't tend to warrant worrying about resizing all the controls.
To make the dialog non-resizable expand its Constraints property and set MaxHeight and MinHeight to be the same as the Height property, then set MaxWidth and MinWidth to be the same as Width. Finally set BorderStyle to bsDialog to remove the minimise/maximise buttons on the caption bar.
Back on the main form we need two buttons, captioned Show &Windowand Show &Dialog. Their event handlers should call the Show and ShowModal methods of each form respectively:
procedure TfrmMain.Button1Click(Sender: TObject);
begin
  frmWindow.Show
end;

procedure TfrmMain.Button2Click(Sender: TObject);
begin
  frmDialog.ShowModal
end;
In order for the programs to compile, we must use the form units of frmWindow and frmDialog in the main form unit. You can either do this yourself or use Alt+F11 (see keystrokes appendic). Now the program should run and allow you to show the modeless window (from where you can readily switch back to the main form) or the modal dialog (which you must close before you can switch to any other form).
To prove that we can access components on other forms, expand the event handlers above to:
procedure TfrmMain.Button1Click(Sender: TObject);
begin
  //Add current date/time at end of memo text
  frmWindow.Memo1.Lines.Add(DateTimeToStr(Now));
  frmWindow.Show
end;

procedure TfrmMain.Button2Click(Sender: TObject);
begin
  //Set checkbox to reflect window visibility
  frmDialog.CheckBox1.Checked := frmWindow.Visible;
  if frmDialog.ShowModal = mrOk then
    frmWindow.Visible := frmDialog.CheckBox1.Checked
end;
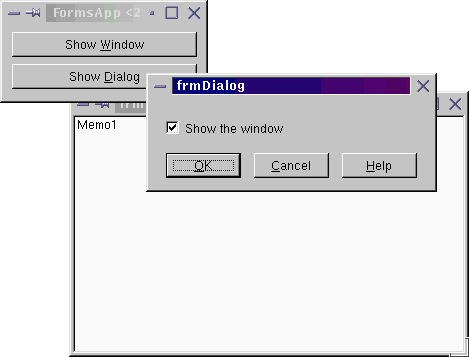
The dialog's check box shows the current visibility of the window. If you toggle the checkbox and press OK, the window's visibility is toggled to match (without adding the time to the memo, as happens when you push the main form button) as you can see in Figure 4.
Figure 4: Multiple forms interacting in a Kylix application
Unfortunately space considerations prevent us looking at this form interaction area in any more depth right now, but the main points should be clear. To access a form, you use its form unit and to access components on a form, just qualify their references with the form name as in the above code.
As your Kylix projects grow larger, with more forms and units, you will find it useful to familiarise yourself with some new navigation keys as well as some other useful IDE features. Some of these have been mentioned before and all involve function keys. Turn Scroll Lock on to prevent your Window Manager swallowing these function key presses.
F12 (View | Toggle Form/Unit) as you should already know, toggles between a form unit and the corresponding Form Designer.
Ctrl+F12 (View | Units...) shows a list of all the source files in the project. This includes all the units and also the project file, which can also be accessed with Project | View Source.
Shift+F12 (View | Forms...) shows a list of all the forms in your project
Alt+F12 toggles the textual/visual view of a form. It acts as a shortcut for right-clicking on a form and choosing View as Text, and also for right-clicking on the editor (when showing a form in text view) and choosing View as Form. Delphi and Kylix are sometimes described as "Two-way Tools" thanks to them allowing you to modify forms visually using the Form Designer and Object Inspector, or textually in the editor.
Ctrl+Alt+F11 (View | Project Manager) invokes the Project Manager (see Figure 5), which allows you to see all the files belonging to your project in a tree control. The Project Manager allows you to work with project groups (.bpg files, which group related projects together) and switch between them as you need.
Figure 5: The Kylix Project Manager

Ctrl+F11 (File | Open Project...) lets you open a project or project group. This is preferable to File | Open... as you only see appropriate project files, rather than projects and units, and so are less likely to open a unit instead of a project by mistake.
Alt+F11 (File | Use Unit...) shows you a list of all the project units that have not been used by the current one. You can choose any of these and it will be added to the implementation section's uses clause.
Shift+Ctrl+F11 (Project | Options...) gives you a multi-page dialog full of options that affect the operation or generation of the executable project. This includes which form is the main form, which forms are auto-created, various compiler switches and search paths for used units.
As mentioned in the other boxout, Shift+Ctrl+F11 invokes the project options dialog. There are many options and flags available in the dialog, but there are some you should be more aware of than others.
To start with, you can choose which form is the project's main form on the Forms page (you can also do this by editing the project source file directly, making the main form be the first form created).
On the Application page you can change the application's title. Normally this will be the executable file name, but can be made a more readable string. The title is used in two places: as the caption of message box's generated with ShowMessage and also on Desktop representations of your running application, for example the caption on a KDE Taskbar button.
The Compiler page has many compiler switches, but the defaults aren't necessarily the best in all cases. Whilst developing an application and debugging it we recommend you:
Various logic problems will be identified at runtime through these latter settings, although the program will run a little slower due to the extra code. Toward the end of your development/testing cycle you may choose to invert these switches and recompile all your source code (Project | Build project).
Note that none of the Debugging options on the Compiler page affect the generated executable. All compiler-generated debug info defaults to being stored in the compiled unit files (.dcu or .dpu files). When these are all linked together into the final executable, debug information does not need to be included (the IDE still has all the information it needs to do debugging in memory).
Ensure you keep the Show hints and Show warnings options enabled at all times, and do your utmost to take heed of them (and therefore hopefully remove them). It is very common for an application to produce a slew of hints/warnings and for the developer to do nothing about them, as they feel they know why they are being produced. The problem with this approach is you end up getting new (more important) hints/warnings that go unnoticed amongst all the others.
The Linker page does allow you to embed debug information in your executable and this might be appropriate if you need to use a debugger other than the Kylix integrated debugger.
The Directories/Conditionals page lets you specify the locations of your reusable units so the compiler can find them in the Search path option. Additionally, as a way of keeping your disk free of countless intermediate files, you can specify that compiled units are to go to some specific directory (rather than the same directory as their source) with the Unit output directory setting. Finally, the Output directory setting controls where the generated executable file will be placed.
If you often need to set a number of project options (for example to the suggested values here) it may be prudent to make a new project, set up the options as you like them to be, check the Default checkbox and press OK (see Figure 6). This stores all the options in the project options dialog in a default project file (~/.borland/defproj.kof), which is then used for all new projects.
Figure 6: Setting sensible default options for all new projects

Now that we can make use of multiple forms, the scope for building useful and flexible Kylix applications widens. Also, knowledge of how units are laid out and used will prove important as you build up libraries of useful routines that can be shared between projects. Next month we'll look at more useful Kylix techniques.
Brian Long used to work at Borland UK, performing a number of duties including Technical Support on all the programming tools. Since leaving in 1995, Brian has spent the intervening years as a trainer, trouble-shooter and mentor focusing on the use of the C#, Delphi and C++ languages, and of the Win32 and .NET platforms. In his spare time Brian actively researches and employs strategies for the convenient identification, isolation and removal of malware.
If you need training in these areas or need solutions to problems you have with them, please get in touch or visit Brian's Web site.
Brian authored a Borland Pascal problem-solving book in 1994 and occasionally acts as a Technical Editor for Wiley (previously Sybex); he was the Technical Editor for
Mastering Delphi 7
and
Mastering Delphi 2005
and also contributed a chapter to Delphi for .NET Developer Guide
.
Brian is a regular columnist in The
Delphi Magazine and has had numerous articles published in Developer's Review,
Computing, Delphi Developer's Journal
and EXE Magazine. He was nominated for the Spirit
of Delphi 2000 award.